Drag-and-drop functionality is useful for many types of games – an inventory system in an RPG, dragging letters onto a word game board, etc. With a simple script you can add drag-and-drop functionality that will work with both mouse and touch input. This is also a perfect problem with which to demonstrate my technique for simplifying complex functionality.
My Technique
I like to break down a problem into its constituent parts, and tackle each separately.
For drag-and-drop I figured I needed to know the following:
- Is the player touching the screen? And where?
- Is the player currently touching/dragging an object?
- Has the player’s input changed since the last frame (has she started or ended a touch gesture?)
That’s all that is needed for drag-and-drop. Three simple problems that are each easily solved. Each of these steps will roughly correspond to a method in my final script.

Competencies
I will assume you know Unity basics, but if anything here goes over your head, please refer back to some of my earlier posts (such as my Pong clone for beginners) to fill in your gaps. There is nothing particularly advanced in here, but I will by necessity use some Unity terminology along the way.
As usual you can download my sample project or follow along, or some combination of the two.
Create a Unity Project
Create a new 2D Unity project. You can add this script to an existing project, but only do that if you’re comfortable with it. It will be easier to follow if you’re inexperienced if you create a new project.
Create an Object to Drag
Let’s create a simple object with a sprite and a collider. You can use any image you want. Some public domain Kenney images are in the sample project if you want to use those.

Create a new GameObject in the scene and add the following components:
- A SpriteRenderer with an image of your choosing. Make sure it’s big enough to drag around with your mouse or finger.
- A Collider2D. Use either BoxCollider2D or CircleCollider2D.
Rename your object to match the image you used.
The Collider2D is used to detect when you are touching the object, and of course the SpriteRenderer gives the object its appearance.
The InputManager Script
I’ll go through the script piece-by-piece, and then give you the complete script at the end.
Methods
We only have two methods (plus the Update() MonoBehaviour method):
- DragOrPickUp() – if an item is being dragged, move it with the input; if an object is not being dragged, pick up an object that’s being touched.
- DropItem() – releases a picked up item
- Update() – calls the above methods when required according to input and property values (below).
Properties and Variables
- CurrentTouchPosition – returns the position of a detected touch/mouse input
- HasInput – returns true when the player is currently touching the screen/holding the mouse button
We also need a few variables:
- draggingItem – whether the player is currently dragging an item
- draggedObject – holds a reference to an object being dragged
- touchOffset – allows a grabbed object to stick realistically to the player’s touch position (more about this later).
I’ll go through each method separately, and show the full script afterwards, so feel free to jump to the full script or read the following sections to see how each part works.
Update()
The Update() method is quite simple:
void Update ()
{
   if (HasInput)
   {
       DragOrPickUp();
   }
   else
   {
       if (draggingItem) DropItem();
   }
}
I like to keep methods like Update() free of too much logic, so, as in this example, the method becomes almost a plain-English sequence of events. In this case we just check if there is input from the player, and we either pick up or move the selected object (if there is input) or drop any currently picked up object (if there is no input).
You may think that some of the small methods and properties in this script could easily be added to Update(), and you wouldn’t be wrong. However, I like to keep my code modular, which helps readability and debugging. It also allows me to add extra functionality quite easily later.
HasInput
I’ve implemented HasInput as a bool property. It checks if the player is currently interacting via mouse click or touch.
Note: I’ve used Input.GetMouseButton(0). In Unity, touch input also counts as GetMouseButton(0), as Unity abstracts away input to some extent. To detect touch directly you can use:
return Input.touchCount > 0; // returns true if at least one touch is detected on the screenSee the Unity documentation for more details about the various input methods.
private bool HasInput
{
  get
  {
      // returns true if either the mouse button is down or at least one touch is felt on the screen
     return Input.GetMouseButton(0);
  }
}
CurrentTouchPosition
This property returns the current position of a touch. We get this position during dragging and picking up objects.
The input position is attained via Camera.main.ScreenToWorldPoint using either the current input position. Basically, Camera.main.ScreenToWorldPoint lets us compare an input position with the position of items within our scene (the input is in screen space, but our scene objects are in world space co-ordinates).
DragOrPickUp()
This method is the most complex of the script. It is called when there is touch input detected, and it does one of the following:
- If an object is already picked up, that object is moved according to the input’s current position
- If an object is not already picked up, it checks if the current input it touching an object (using a raycast), and if so picks up that object by storing it in the draggedObject variable and setting the draggingItem variable to true.
private void DragOrPickUp()
{
   var inputPosition = CurrentTouchPosition;
   if (draggingItem)
   {
      draggedObject.transform.position = inputPosition + touchOffset;
   }
   else
   {
      RaycastHit2D[] touches = Physics2D.RaycastAll(inputPosition,    inputPosition, 0.5f);
      if (touches.Length > 0)
      {
        var hit = touches[0];
        if (hit.transform != null)
        {
          draggingItem = true;
          draggedObject = hit.transform.gameObject;
          touchOffset = (Vector2)hit.transform.position - inputPosition;
          draggedObject.transform.localScale = new   Vector3(1.2f,1.2f,1.2f);
        }
     }
   }
}
After caching the current input position, we check if the player is already dragging an item (the draggingItem bool variable), and if so the dragged object’s position is changed to the input’s position (minus the offset – more on that in a moment). This means the dragged object effectively sticks to the player’s finger.
However, if no item is being dragged we need to check if the current touch (this method is only called when we have input from the player) is hitting an object that can be dragged. We use RaycastHit2D to detect all colliders under the player’s finger. Because this is a simplified script we just take the first object that is ‘hit’ by the raycast (if there is one) and that object is picked up by being stored in the draggedObject variable, and we set the draggingItem bool to true to indicate that we are now in dragging mode.
I’ve also added scaling to the dragged object to make objects a little larger when being dragged.
The Offset

When picking up an object we also set an offset value that is used when moving it. This offset makes the object stick to where your finger made initial contact with it.
When you move a transform you are telling Unity where the centre of the object goes (normally). When dragging an object, the item being dragged will snap so that its centre is where your finger is, which will feel jerky and unnatural. The offset makes it so the object moves relative to your finger (it basically remembers where the centre of the object should be relative to your finger based on where you first touched the finger).
If you want to see what happens without the offset, make touchOffset equal Vector2.zero when the object is first picked up, then drag around an object by its edge.
DropItem()
The last method is used to ‘drop’ an object when the touch input stops. It’s pretty self explanatory, and simply sets the draggingItem bool to false, which means the rest of the script knows that an object is not being dragged, then sets the dragged object’s scale back to 1.
The Full Script
Create a new C# script called InputManager, and put the following code in it:

using UnityEngine;
using System.Collections;

public class InputManager : MonoBehaviour
{
   private bool draggingItem = false;
   private GameObject draggedObject;
   private Vector2 touchOffset;

   void Update ()
   {
     if (HasInput)
     {
       DragOrPickUp();
     }
     else
     {
       if (draggingItem)
       DropItem();
     }
   }
   Vector2 CurrentTouchPosition
   {
     get
     {
       Vector2 inputPos;
       inputPos = Camera.main.ScreenToWorldPoint(Input.mousePosition);
       return inputPos;
     }
   }

   private void DragOrPickUp()
   {
     var inputPosition = CurrentTouchPosition;
     if (draggingItem)
     {
       draggedObject.transform.position = inputPosition +   touchOffset;
     }
     else
     {
       RaycastHit2D[] touches = Physics2D.RaycastAll(inputPosition, inputPosition, 0.5f);
       if (touches.Length > 0)
       {
         var hit = touches[0];
         if (hit.transform != null)
         {
           draggingItem = true;
           draggedObject = hit.transform.gameObject;
           touchOffset = (Vector2)hit.transform.position -    inputPosition;
           draggedObject.transform.localScale = new  Vector3(1.2f,1.2f,1.2f);
         }
       }
     }
   }

  private bool HasInput
  {
    get
   {
       // returns true if either the mouse button is down or at least one touch is felt on the screen
       return Input.GetMouseButton(0);
    }
 }

 void DropItem()
 {
   draggingItem = false;
   draggedObject.transform.localScale = new Vector3(1f,1f,1f);
 }
}
Add the Script to the Scene
Create an empty GameObject in the scene and add the above script to it.
What Next?
There are lots of ways to improve this functionality. You should probably use tags or layers to determine which objects can be picked up. If you’re using physics you may need to disable colliders when an object is being moved. You might need to implement logic for when two items overlap and you need to determine which one the player is trying to touch.
Thank you very much for this step-by-step tutorial. I realy find out this helpfull.
Two problems that i had in compilation stage.
void DropItem()
{
draggingItem = false;
draggedObject.transform.localScale = new Vector3(1f;1f;1f); <—– her it should be (1f,1f,1f)
}
if (touches.Length &gt; 0) 0)
I also deleted
draggedObject.transform.localScale = new Vector3(1f;1f;1f);
cause its just change Scale isnt it?
Thanks for pointing out the errors in the code. WordPress sometimes messes up code, and it can be really hard to spot things that are wrong.
Yes, the
draggedObject.transform.localScale = new Vector3(1f,1f,1f);
line reverts the object’s scale to the original scale because when the object is picked up its scale is increased to 1.2 to make it a bit bigger (as if it’s picked up and is now ab it closer to the player’s eyes). The scaling is not important to the functionality, but I think it gives the player a bit of extra visual feedback.
Good work, that was very helpful for me, thank you for sharing this.
But I have a question or a problem I hope you can help me about it, I want to drag or move object only along x or y axis not both of them just only one axis by using some of this code. Can you help me or give any hint for that?
You could ‘lock’ either the X or Y axis by keeping it the same when the player is moving the object.
Instead of this line:
draggedObject.transform.position = inputPosition + touchOffset;
you could put something like:
if(onlyMoveHorizontally)
{
Vector2 dragPos = inputPosition + touchOffset;
// use the Y position of the touch, but keep the object’s current Y position
draggedObject.transform.position = new Vector2(dragPos.x, draggedobject.transform.position.y);
}
You can use bools (or an enum) to let the player move on one or both of the axes.
Thanks, but I can only move along the x axis now and I want to move along y axis
Here is the code that move along the x axis;
if(Input.GetAxis(“Vertical”) != null){
Vector2 dragPos = inputPosition + touchOffset;
draggedObject.transform.position = new Vector2 (dragPos.x, draggedObject.transform.position.y);
}
To move only on the Y axis you just need to reverse that code. To move on the Y axis you want to keep the current X axis and combine it with the touched Y position:
draggedObject.transform.position = new Vector2 (draggedObject.transform.position.x, dragPos.y); // keep current X position and move on the Y axis
Keep the drag position of the axis you want to move on, but use the existing position of the other axis so the object only moves on the one axis.
Okey I got it, Thanks a lot Damien 🙂
Excellent tutorial – thank you.
Spotted 1 bug in the final complete script – seems to be missing the line:
draggedObject.transform.localScale = new Vector3(1.2f,1.2f,1.2f);
Hi thank you for the great tutorial. Maybe you can also quickly explain how you would implement a script to implement logic for when two items overlap?
It depends on exactly what you want to do. This post: https://unity.grogansoft.com/word-game-drag-and-snap/ has a bit of code for detecting objects the dragged object is touching. It’s pretty easy to keep track of objects overlapping – add each touched item to a list when it collides/triggers, and remove the item from the list when it stops colliding (e.g. OnTriggerExit2D). Then when the player releases a dragged object you can determine what (if anything) happens to the objects overlapping.
You can use physics if you want dragged objects to push other objects out of the way.
Thank you that is exactly what I’m looking for
Maybe you can tell me/us also how to implement logic for when two items overlap? Thank you for the great tutorials!
Thanks for the tutorial,
I have a problem, the problem is when I use this code, all of object that in the screen move when I touch it but I just want to move one object.
I added the code to the object which I want to move but still all of the object that in screen can move, I could not solve the problem. Can you help me about that?
You can use tags to determine what objects can be dragged and what can’t (or you could implement different physics layers). In the DragOrPickUp method you could add a simple tag check, something like:
if (hit.transform != null && hit.transform.tag=”Draggable”)
Create a new tag called ‘Draggable’ and set items you want to drag with that tag.
The script shouldn’t be added to individual objects as it isn’t written to work with the specific gameobject it’s attached to. It will still work, but it’s logically built as a ‘scene wide’ script.
Thank you! This is such a helpful tutorial!! The best I’ve found by far. Only thing I don’t understand is how and where to incorporate this line into the code to make only certain objects draggable
if (hit.transform != null && hit.transform.tag=”Draggable”)
Thanks again!
Thanks for the tutorial. Is it possible to extend this to allow for multi touch points?
Unity has no problem with multiple touches. You’ll need to keep track of touches separately. Where the code has ‘touches[0]’ it is only looking at the first detected touch. ‘touches[1]’ will get the second touch, and so on.
hi. i’ve used your code and it works exactly to what i had in mind. hopefully you can help in this dillema. how can i make the objects collide? i’m hoping to destroy the object that it will collide but it’s not working. here’s what i have:
void OnCollisionEnter2D(Collision2D coll)
{
if (coll.gameObject.name == “bigbag”)
Destroy (coll.gameObject);
}
so if the object collides with bigbag, it should get destroyed.
thanks.
At least one of the objects must have a rigidbody2d in order for the collision to be detected. To prevent the rigidbody making the object(s) move with gravity, set it as kinematic in the Inspector window. I hope that helps.
How can I make it return to its original position when the object is released?
Thanks for the tutorial.
You would just need to store the original position somewhere, and then set that back as the current position when the object is released.
I did a follow-up article that includes this functionality:
https://unity.grogansoft.com/word-game-drag-and-snap/
The approach there is to store the position of an object when it is picked up, then return it to that position when dropped (unless it is dropped in a valid place – though that part is probably not relevant to what you need). Another approach would be to store the starting/original position of each object in a script attached to the object, and then use that position if the object needs to be reset.
Thanks mate, this tutorial is simple yet powerfull!
looking forward for another tutorial!
Awesome tutorial! One question: How do I adapt this to only allow the click and drag of one specific, predefined game object instead of all of them?
The quickest way to do this would be with tags. Create a new tag for draggable objects (a tag called ‘Draggable’ makes most sense), then make this change to the DragOrPickUp method:
if (hit.transform != null && hit.transform.CompareTag(”Draggable”))
So you are telling it to only pick up/drag an object if it has the ‘Draggable’ tag.
Another method would be to create a script for draggable objects, and then only allow dragging when the script is on with the object being tapped. This is better if you need to have a lot of behaviour specific to your draggable objects.
That worked! Thanks so much for the insanely quick reply. One more question: If I wanted to allow dragging along the X axis, what’s the easiest way to go about it? I’m assuming that I can just drop the Y coordinates out of “draggedObject.transform.position = inputPosition + touchOffset;”?
Disregard, I figured it out! Just added a “inputPos.y = 0.0f;” before returning inputPos in CurrentTouchPosition.
What is hit in this context?
So I’ve tried this and it just full on doesn’t do anything am I doing something wrong?
Is there a GameObject with the InputManager script attached in your scene?
Also check that your colliders are 2D and that they are appropriately sized to match the sprites.
Hello,
I’m having a similar issue. When I click my sprite it does get larger which means it’s going into the DragOrPickUp() method, but it won’t let me drag it around. I don’t have either of the mistakes you mentioned, is there something else that could be wrong? I’m using the code file that was provided with the download so it would have to be an error outside of the code, unless there were some new updates.
I’ve just downloaded the project and run it in the most recent version of Unity(2018.2.0.f2), and it works fine for me, so I don’t know what the issue could be.
Are you holding down the mouse button while dragging? Since the DragOrPickUp() method is being called, that rules out most things that could be going wrong.
Have you made any changes to the code? The only thing I can think of that would cause it to behave as you describe is if you have GetMouseButtonDown() instead of GetMouseButton() in the HasInput property.
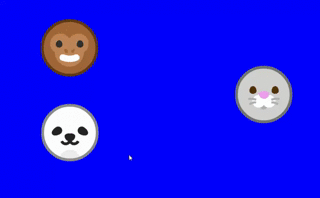
I downloaded and made a duplicate of your file, then reset the panda and rabbit transform to 0,0,0 then set the order in layer for monkey: 0, panda: 1 and rabbit: 2. How come on running, the first object selected and dragged is the monkey, and then next the rabbit?
Do you mean you are setting the sprite order in layer on those objects? The sprite order does not affect the raycasting at all, it is a separate thing.
The raycast hits the collider, not the sprite. So what matters is the order in which the colliders are detected. In the raycastall, the colliders hit should be in order of their position on the Z-axis, and in the example you describe all the objects will be at zero on the Z-axis. Unity can’t determine which order the objects should go in, so I assume it is random.
To pick specific objects when multiple objects overlap, you can therefore set their positions on the Z axis or use something else like tags. The best approach depends on what you are doing. If you have different types of objects and ObjectA should always be on top of ObjectB, tags are probably the best way (you can check the tags of all the obects detected and then pick up the one you want).
Makes sense, thanks.
Also I forget camera z pos is -10 (behind objects), so we make monkey appear from behind bunny by setting the monkey render order below bunny. Ha ha!
I set monkey: z: -1, panda: x: 0, and bunny: z; 1. camera: x: -10. When I press and hold on monkey, the monkey vanishes inside panda, and then I cannot grab panda. Any idea why this is?
If you look at the monkey in the Inspector you will notice that the Z position is being changed to 0 when it is grabbed. This is because the script is doing everything in 2D (e.g. Vector2).
When you drop the monkey, it will be on the same Z position as the panda, so you can’t be sure which object the raycast will hit first.
To fix this you will need to make sure the grabbed object’s z position is preserved. You can store it in a variable when the object is grabbed:
storedZ = draggedObject.transform.position.z;
Then when the object moves, put this value into the Z. Something like this:
Vector3 newPos = inputPosition + touchOffset;
newPos.z = storedZ;
draggedObject.transform.position = newPos;
That should make it work with overlapping objects.
Thanks a bunch, Damien.
Where do you get the fun Gravtars from?
I made my own from my Xbox avatar.
. . . like the one assigned to me?
Yours will be randomly assigned unless you set your own. I don’t know where the images come from, it’s all automatic.
Anyone interested can look here: https://www.splitbrain.org/projects/monsterid
This script is really works. Thanks for this wonderful tutorial! 🙂 but how can i convert this in Javascript?
I think the only way to convert to JavaScript would be to do it line by line. In Unity you can combine UnityScript/JavaScript and C# scripts into one project.
There is nothing particularly complicated in this project, so it shouldn’t be too difficult to convert it – there’s not a huge difference in the languages.
What do i need to add to make the object throw-able, across the screen cheers
I’m not sure how to approach this. You would need to keep track of movement, then when the object is dropped, apply a force equivalent to the movement. I’d probably use a rigidbody and built-in physics. You can do a quick test by just adding a random force whenever an object is dropped. You’ll need to add a rigidbody to the objects, and probably want to disable gravity on them. Look up ‘AddForce’ in the Unity documentation. Once you get that working, figure out a way to ‘record’ the movement while the object is dragged so you can apply a force that takes direction and speed into account (i.e. the faster you drag the object the further it gets thrown).
hyee…i want to ask..is it possible if put many item in one place
The code checks if a cell is empty before allowing you to drop a tile in it. You could simply bypass this check.Check out the section ‘Deciding the Closest Cell’ in the article. The last bit of code checks if ‘currentCell.childCount !=0’. If that is true (the cell has a child – a tile already there), the tile is returned to the starting position, otherwise it will be dropped into the cell.
Remove that whole section of code except for the following two lines:
    transform.parent = currentCell;

    StartCoroutine(SlotIntoPlace(transform.position, newPosition));
Hello Sir,
Thanks for the tutorial .
I want to make this object into a draggable block in a tetris game . So how could I able to make the block able to drop into the board grid (where the shape lands) .
hi how we can drag an item to a specific position and limit the boundary that an item drag?
Hi,
great tutorial, really useful program.
1 thing: when I applied this script to the intended object it applied the drag-and-drop capabilities to every sprite in the scene. Is this intended, and can I make it so this isn’t the case?
The quick answer is that you can remove the collider from any object you don’t want to be draggable.
However, you could use layers or tags to determine if an item can be dragged, and this will let you enable and disable dragging on objects.
I suggest looking into layers and then adjust the part of the code that does the raycast to raycast only on a specific layer. The code in the tutorial raycasts every layer and so will detect all colliders. If you change it to only check layer 1 it will only let you click and drag objects on layer 1.