What’s on the Menu?
By the end of Part 7 we had a mostly feature-complete Pong clone. But there’s still work to do, and there are still lots of cool things to learn about using Unity. In this part we’ll dip our toes into Unity graphical user interface (GUI) features to display the score, create a menu screen, and do some other UI stuff.
Unity’s GUI
The Unity GUI system works via a canvas. You add a Canvas object to your scene, and then add children to this canvas with text, buttons, and so on. The Canvas (along with its UI) is overlaid on your game screen to present menus, information, health bars, and so on.
Add a Canvas
- Add a Canvas to the scene via the main menu GameObject | UI | Canvas.
Select the Canvas in Hierarchy and look at its contents in Inspector. You’ll see a bunch of stuff that Unity needs to draw the GUI. The most obvious difference is that instead of the usual Transform, GUI objects have a Rect Transform:

Add Text
With Canvas selected in Hierarchy, add a UI | Text component in the Inspector:

- In the new component, in the Text field, type “Player One 0 – 0 Player Two”. This is ‘placeholder’ text.
- Change the Color property (just like we did for the paddles earlier) so the text is clearly visible (view the text on the Game screen at the top-left corner).
- Centre the text and align it to the top of the screen.
You can copy the settings from the following image:

You will see the text in the Scene and Game windows. Pay attention to how it looks in the Game window rather than the Scene window, as the Canvas GUI view can be confusing at first.
To ensure the text stays the same size regardless of screen resolution, set the Ui Scale Mode field in the Canvas Scaler (Script) component to Scale With Screen Size:

Awesome. But of course we need that score to change throughout the game. Let’s do that now.
Draw the Score
We need modify GameManagerScript to change the score text whenever the score changes.
Open GameManagerScript. Unity’s GUI stuff has its own namespace, which isn’t in MonoBehaviour scripts by default.

To add the namespace, add the following code at the top of the script (you can see where it belongs as there are some other lines very similar at the top):
using UnityEngine.UI;GameManagerScript also needs a reference to the score text component, so add this to the variables list in GameManagerScript:
[SerializeField]
Text scoreText;
Save the script.
With GameManager selected in Hierarchy, drag-and-drop the Canvas GameObject onto the Score Text field in the Inspector.
Add UpdateScoreText() Method
Open GameManagerScript and add the following method:
void UpdateScoreText()
{
   scoreText.text = "Player One " + playerOneScore.ToString() + " - " + playerTwoScore.ToString() + " Player Two";
}
This changes the GUI Text component to show the scores by combining a few words with the variables that store the player scores.
Call the UpdateScoreText() Method
Now we need to make sure that method is called whenever a goal is scored, and also when the game restarts (i.e. when the score is reset). Find the GoalScored method and add the following line to the very end of the method (before the curly brace, of course):
UpdateScoreText();And in the GameOver method, again at the end, add the following line:
UpdateScoreText();Great. Now the score text changes whenever the scores change in the game!
Try it out. How cool is that?
Would you Like to See the Menu?
Since we haven’t yet done anything with scenes, and all games need a menu, let’s create a menu scene/screen.
Create a new Scene
Save the current scene: menu File | Save Scene.
Now create a brand new scene: menu File | New Scene. Save this new scene (File | Save Scene) in the Scenes subfolder, and name it ‘Menu’.
Add this new scene to the build settings (File | Build Settings, then Add Current). Then, using drag-and-drop, move the scenes so that Menu is before Scene1 in the list:

We’ve now added our scenes to the build settings so they will be included whenever we build a copy of this game. When this game launches from a built copy it will start with the scene at the top of that list, which is the Menu scene.
Close the Build Settings dialog and get back to building our menu.
Build a Menu
Our main menu screen needs a few basic elements:
- A game title
- A programmer credit
- A background
- A Start button.
We will add those items to a UI Canvas, just like the way we added score text earlier.
Add a Canvas to the scene: menu GameObject | UI | Canvas.
Add a UI Text component to that canvas and modify its properties to display the game title (you can call it simply ‘Pong’ or come up with your own name) in a pretty large font near the centre of the screen.
Aim for something like this (but feel free to play around – this is your game after all):

Set the canvas to scale with the screen size like we did earlier with the score text.
Add a Byline
Because we can only add one Text component to a GameObject, we need to create our byline as a separate GameObject, but we need it to be a child of the UI canvas.
- Create an empty GameObject and rename it to Byline.
- Drag the Byline GameObject onto the Canvas GameObject so it becomes a child of Canvas.
- Customise Byline’s Text component to show your byline (e.g. ‘By Fred Bloggs’). Use the same techniques as for the game title to change the text size and colour.
- With Byline selected in Hierarchy, drag the byline transform in the Scene view to position it nicely below the game title.
Now your screen should look something like this:

Background
You can add a background image or change the background colour if you like. To add a background image you can add a new GameObject as a child of Canvas and give it a UI Image component. Then drag in any image you want to use as your background.
To change the background colour you can simply change the camera’s background:
- Select Main Camera in Hierarchy
- Change the Background property in the Camera component in the Inspector.
Button it Up
The last thing our menu needs is a button so we can actually start the game.
- Add an empty GameObject to Hierarchy, and rename it to ‘StartButton’.
- Drag StartButton into Canvas to make it Canvas’s child.
- Select StartButton in Hierarchy.
- Add a UI Button component in the Inspector.
- Add a UI Image component in the Inspector.
- In the Inspector, drag-and-drop the Image component onto the Target Graphic field in the Button (Script) component (this makes the image the button image).
- Now with StartButton selected in the Hierarchy, move its transform to a position below the game title and byline texts.
- Add the PlaySprite sprite to the Image(Script) component, then use the Rect Transform (at the top of the Inspector) to resize the button to a nice size and centre it on the X-axis (this sprite is in the project resources download from Part 1).
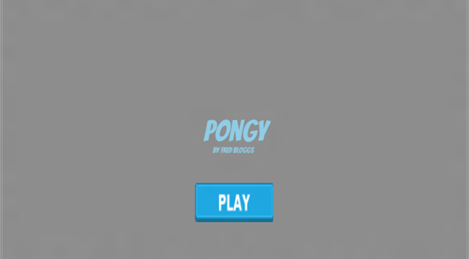
Here’s what my main menu screen now looks like:
That button might look incredible J, but it doesn’t actually do anything when clicked yet. In the Inspector you’ll notice that the Button (Script) component has an On Click() event list:

This list will hold the action(s) to perform when the button is clicked.
- Click the little plus sign at the bottom of the On Click() event list. You should see this:

- Drag-and-drop the Button (Script) component onto the blank field that currently says None (Object):

We also need to perform a specific action when this button is clicked, but we need to script that action first.
You should know how to create a script now (if you can’t remember refer back to earlier parts of this tutorial), so I won’t go into detail.
- Create a new C# script called ‘MenuButtonScript’ and attach it to the StartButton GameObject.
Here is the entire code for MenuButtonScript:
using UnityEngine;
using System.Collections;

public class MenuButtonScript : MonoBehaviour {
  public void OnClicked()
  {
     Application.LoadLevel ("Scene1");
  }
}
As you can see from the above code, the line Application.Loadlevel(“Scene1”) loads our main game scene, and that’s how you change scenes in Unity via a script. Quite simple.
Lastly, back in the button’s events list you can now choose which function to call when the button is clicked using the drop-down selector in the On Click() area in the Inspector. Select Menu Button Script > OnClicked(). Now the OnClicked() method in MenuButtonScript will be called every time the button is clicked.
Hit Play to launch the game.
Recap
We’ve come a long way since we created a stationary ball in Part 1!
We’ve now used Unity 4.6’s new GUI features to add a score display to our game, and build a menu screen. We also learned a bit more about scenes, including how to navigate between scenes via the Application.Loadlevel() method.
We’ve now created a (mostly) full game. We’ve learned a huge amount over these eight tutorials about how to use Unity. Everything you’ve learned so far can be used as the building blocks of more complex games. You’re probably already getting ideas about how these building blocks are used in your favourite games and how you can use them in your next project!
This isn’t the end of the Pong tutorials.
Continue to Part 9, where we’ll add further polish to the game and tweak it into a masterpiece!
Love this so far. First time I feel I’m really getting Unity. Just a quick note, while doing this demo the compiler notified me that:
Application.LoadLevel (“Scene1”);
is deprecated, and to use:
SceneManager.LoadScene(“Scene1”);
instead. With the substitution, everything was just fine.
PLEASE NOTE
Instead of
Application.LoadLevel (“Scene1”);
now use this:
UnityEngine.SceneManagement.SceneManager.LoadScene (“Scene1”);
Refer to this page https://docs.unity3d.com/ScriptReference/SceneManagement.SceneManager.html
Thanks for pointing that out. Unity has made changes to the scene management in a recent update, so the tutorial is a bit outdated regarding that. I will update the tutorial once the next big Unity update is released.
Thank you very much for your work.
Unity is not allowing me to drag the Canvas into the Score text field in the inspector how do you fix it?
Most likely your canvas object does not have a Text component on it.
Unity will only let you drag something into a field that either matches its type (e.g. Canvas > Canvas) or has a component on it that matches the type (e.g. a Canvas with a Text component into a Text field).
Using Unity 2019.3 I had to specifically drag the Text field, I could not just drag the Canvas even though it had a Text component.
Hello,
I added the button and it works fine, but for some reason the button sprite isn’t attached. In other words, if I click play on the blue box nothing will happen, but if I move it so that the white button isn’t “covered” then the button works perfectly fine. For some reason the play sprite is just seen as an image and not as part of the button. Is there a way to fix this??
Thanks for this lesson. Love you so much!