Paddling Towards a Complete Game
Now that we have a skeleton of a game it’s time to fill in the feature gaps.
In Part 6 we’ll work on the player paddles. We will:
- Adjust the ball angle according to the direction of the player’s paddle when the ball hits – giving the player a bit of control over the ball.
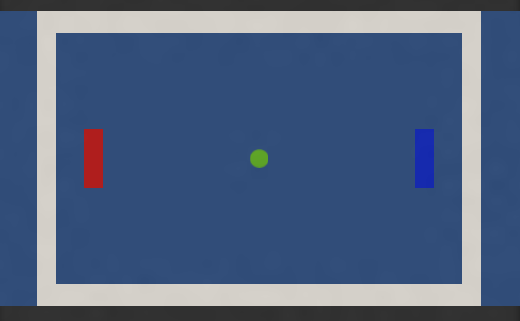
- Shade the player paddles so that each player has their own colour.
Adjust the ball angle
The ball currently bounces idly from the paddle according to the boring ‘laws of physics’. To make the game more fun and challenging the player should have some control over the ball, so we’ll let the player change the ball’s angle by moving the paddle as the ball hits it.
Here’s how:
- Add a public Direction variable to the paddles with three states – up, down, or still.
- Add a collision event to modify the ball’s direction if the paddle is moving at the time of impact.
Open PaddleScript and add the following variables with the existing ones (before the void Start() line):
int direction = 0; // 0 = still, 1= up, -1 = down
float previousPositionY;previousPositionY will store the paddle’s position on the Y-axis (its X-axis position won’t change) every frame so it can be compared to the following frame’s position to determine which direction it is moving (e.g. if previousPositionY’s value is higher than the current value the paddle is moving upwards).
Add the following method to PaddleScript:
void LateUpdate()
{
   previousPositionY = myTransform.position.y;
}
LateUpdate() automatically runs in all MonoBehaviour scripts at the end of each frame, so it’s here that we store the paddle’s position.
In the Start() method, let’s setup the default previousPositionY value, so add this to Start(). This must be placed after the myTransform = transform line (or myTransform will be null and we’ll get an error when trying to use it):
previousPositionY = myTransform.position.y;We set this to the current value because we know that at the start of the game the paddle is not moving. Now, add the following to the end of FixedUpdate() so we can make sure the direction is updated with every frame:
if (previousPositionY > myTransform.position.y)
  direction = -1;
else if (previousPositionY < myTransform.position.y)
   direction =1;
else
  direction = 0;
The above code compares the previous position to the current position and assigns a direction based on that comparison. The direction variable will be updated every frame.
We now know the direction the paddle is moving, so we just need to add one more piece. We will detect when the ball hits the paddle, and apply a force to the ball depending on the paddle direction. Add this method to PaddleScript:
void OnCollisionExit2D(Collision2D other)
{
   float adjust = 5 * direction;
   other.rigidbody.velocity = new Vector2(other.rigidbody.velocity.x, other.rigidbody.velocity.y + adjust);
}
OnCollisionExit2D() is a built-in MonoBehaviour method that runs automatically when a collider within the GameObject the script is attached to comes into contact with another collider.
We make sure the item hitting the paddle is the ball by checking its name, then we apply a force to its rigidbody in the direction of the paddle’s movement. This also has the pleasant side effect of adding a little extra speed to the ball, making it faster and faster as the game goes on.
Try the game now. Move the paddle just as the ball is about to hit it, and the ball gets a push up or down, and the speed increases a little.
Red vs Blue
A quick way to snazz up our game’s graphics is to make the paddles different colours to differentiate the players. It’s really easy. I’ll do mine red and blue, but you can use any colours you want. We’ll do this in the Inspector.
Select a player in Hierarchy, then look at its SpriteRenderer component in Inspector. It has a Color element, which you can change easily. This shades the sprite with whatever colour you select in the colour picker.

Click the white area next to the word ‘Color’, and select a colour from the colour picker that pops up. Close the colour picker when you have the right colour. Do the same for the other paddle and now you have two distinct player colours.

Recap
We have used a bit more scripting to work out which direction our paddles are moving, and also taken advantage of Unity’s built-in 2D physics engine via the OnCollisionExit2D() method. By modifying our sprites in the Inspector we have shaded our player paddles different colours. Well done!
Continue to Part 7 where we will take a huge step towards finishing our game by implementing goals and a scoring system.
is there a way so the ball dosnt speed up while changing direction? I have set my ball up to gain speed over time anyway.