Transforming and More Prefabs
So far we’ve focused on using Unity’s interface. In this section we’ll start shaping our project into something resembling an actual game while learning some key game-making skills.
Here’s what we’ll do:
- Investigate some Unity settings
- Create a wall around our game area
- Place our player paddles in their starting positions
- Resize our ball to suit the paddle size.
Quick Settings Check
Before we work on our game, let’s verify a few settings.
Build Settings
Go to File | Build Settings… from the Unity menu. This opens the Build Settings dialog:

Build Settings lets us specify what platform we want to build our game for, and is also where we choose what scenes to include in our game builds.

Also while here, add the current scene to our build, so that when we eventually build the game the scene will be in it. Click Add Current (b) to add the current scene.
Close the window via the ‘x’ in the corner.
Screen Aspect
Now let’s choose a screen shape for our game. Expand the drop-down list in the Game window’s upper-left. This is the screen ratio we are designing for. Let’s choose 3:2 as a decent shape for Pong (a):

You may notice the blue area (which is our camera’s view) changes shape slightly.
Create a border
Pong needs a border around the screen so the ball can bounce around. We’ll build this border with four walls.
Wall Prefab
A trick you’ll learn to use a lot in Unity development is reusing things, or repurposing them, especially when prototyping or learning new techniques. If you think about it, a player paddle and a wall should be basically the same thing – a hard surface that the ball will bounce from (this is Pong, not a realistic world simulation!). So we’ll modify our paddle prefab to make walls.
We’ll do the following:
- Duplicate a paddles
- Modify this duplicate
- Store the duplicate as a new prefab in the Prefabs folder.
You’ll do a lot of duplication in Unity, so you might as well learn how. Select either of the player paddles in Hierarchy and press Ctrl-D (or right-click and choose Duplicate). A copy of that object will appear below it in Hierarchy.
Rename the new duplicate to ‘WallPrefab’, then drag it out of the Players GameObject so that it is no longer a child of Players.
Now we’ll modify this copy of a paddle into something more like a wall.
Move a Transform
Select WallPrefab in Hierarchy. In the Scene window you’ll notice that some weird items are drawn over the GameObject. Those things (arrows, etc.) allow us to manipulate the transform of that GameObject with the mouse so we can move it, resize it, and rotate it.
Let’s move that wall away from the paddles. First, make sure you have the designer mode set to let you move things. In the upper-left of the main Unity window, select the 2nd item in this toolbar:

Now, making sure WallPrefab is selected in Hierarchy, click-and-drag the little blue square to move the wall away from the player objects.
Move the wall to a position somewhere near the left edge of the screen (you don’t need to be accurate at this stage). It will help to zoom out the Scene window (use the mouse wheel to zoon), and also use the Game window to see that actual placement of items within the ‘game world’.
- WallPrefab‘s transform is moved in the Scene window, and
- It is automatically moved in the Game window (because the Game window is showing a specific view of the Scene content)
- If you look at the Inspector you will see the position co-ordinates of the transform have changed (your numbers will be slightly different, but it doesn’t matter at this stage).
Let’s make that wall a bit bigger. Directly in Inspector, change the Y value in the Transform Scale field to 6.
You just multiplied the wall’s height by six, so it will now be tall enough to stretch the screen height.
Now change the Transform Position Y value to 0. This centres of the wall on the Y-axis.
Your wall should be centred and stretch the entire height of the screen (if it goes off the screen slightly, don’t worry). Now we need it all the way to the left screen edge.
Move a Transform one One Axis
Previously, we moved the transform by dragging the little blue square. That’s fine, but if you want to move it on only one axis you should drag it with the arrows.
Drag the wall transform’s red arrow (the one pointing along the X-axis; it will turn yellow when selected). This only allows movement on one axis so it stays centred on the Y axis. Move it until it is snug against the screen edge in the Game window.
Now you should have this:

Let’s prefab this wall so it stops being a copy of the paddles.
Drag WallPrefab from Hierarchy into the Prefabs folder.
Let’s cheat to create the opposite wall:
- Rename the WallPrefab instance in Hierarchy to WallLeft (don’t rename the actual prefab in the Prefabs folder!).
- Duplicate (Ctrl-D) WallLeft and rename the duplicate to WallRight.
We’ll use a simple trick to position the right wall. We know that (0, 0) is the centre of the screen, and we know WallLeft‘s position – it should be approximately (-7.2, 0). The right wall needs to be the same distance to the right as the left wall is to the left. Note that since WallRight is a copy of WallLeft, it’s position is currently the same as WallLeft‘s.
- Change WallRight‘s Transform Position X value to positive by simply removing the negative sign but leaving the same value.
If all has gone well you’ll now have two walls:

But we still need two more.
- Drag WallPrefab from the Prefabs folder into Hierarchy
- Duplicate the new WallPrefab instance so you have two.
- Rename the new wall objects to WallTop and WallBottom.
-
For both the new wall segments, change following values:
- Transform Scale Y = 0.4
- Transform Scale X = 22
- Transform Position X = 0
- Now drag the new wall segments to their correct positions on the Y axis, making sure to judge their placement in the Game window. You’ll see some overlapping in the Scene window, but the player won’t see this, so it doesn’t matter.
- For the sake of accuracy, adjust the Y-axis positions of the top and bottom walls so they are exactly the same distance from the centre (e.g. -4.65 and 4.65).
Now create an empty GameObject called ‘Walls’ and make the four walls children of it.
Place the Paddles
Let’s make our screen look a little more like a game of Pong and move the player paddles.
You now know how to move a transform, and have some basic understanding of placing things in a 2D space. Use that knowledge to move the player paddles to the appropriate place on the screen.
Select Player1 in Hierarchy, and drag the transform in the Scene window so that it is near the left edge of the screen. Make sure to keep the Y-position at zero (hint: drag the transform with the arrow or manually set the Y value to zero once you’re finished). Repeat with Player2, but to the right. Make sure both paddles are the same distance from the centre of the screen.
Scale the Ball
With the current sizes of the paddles the ball now looks very small. Let’s resize the ball so a more suitable scale.
- Select Ball in Hierarchy
- Change the Transform Scale X & Y values to 2 in Inspector.
The ball doubles in size.
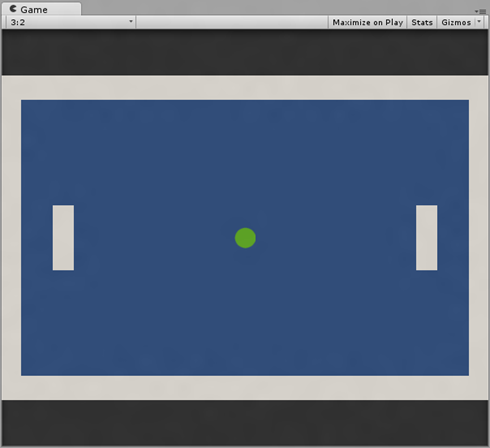
Here’s our screen now:

Now your game looks like Pong, but without the…well, without the moving around being an actual game part. We’ll get into those aspects in later parts.
Recap
We started learning how to modify transforms. We moved some around, rescaled some. We learned a little bit about the co-ordinate system – (0,0) being the centre of the screen.
We also had our first look at the Build Settings dialog and the resolution/ratio selector in the Game window.
Continue to Part 4.
Really Appreciate the tutorial, mate!
tutorial is amazing, thanks